

- Disable Annoying Notifications in Windows 10
- Managing Website Notifications
Managing website notifications may be one of the greatest things you can do for yourself. We have all seen the numerous pop up notifications telling us about the latest news articles, Facebook comments, or deals for an online store we don’t even remember visiting. Many times instead of being helpful, like their intended purpose, we find ourselves frustrated with the deluge of annoying notifications. Luckily, there is hope!
All the major web browsers have a built in notification manager for the allowing & blocking of website notifications. While by default websites must “Ask First” before sending notifications, how many of us actually read the prompt before clicking “Allow”? Note: This is terrible practice, please read and understand prompts before allowing.
Lets take a look at the major web browsers and how to get to their notification managers.
Microsoft Edge (Chromium)
Note: These instructions are for the latest Chromium version of Microsoft Edge. All other versions of Internet Explorer and Microsoft Edge are no longer supported and should not be used as your daily web browser.
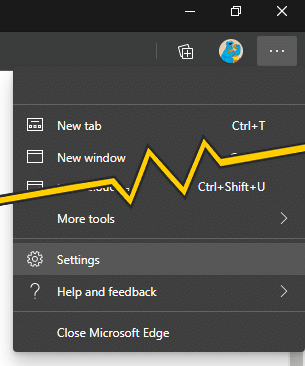
Step 1: Open the Edge menu, the three dots, and click on “Settings”.
Step 2: In the left column of the Setting page, click on “Site Permissions”
Note: Site Permissions is where you can update permissions for other features like Microphone, Camera, Location, and more.
Step 3: Click on the “Notifications” option
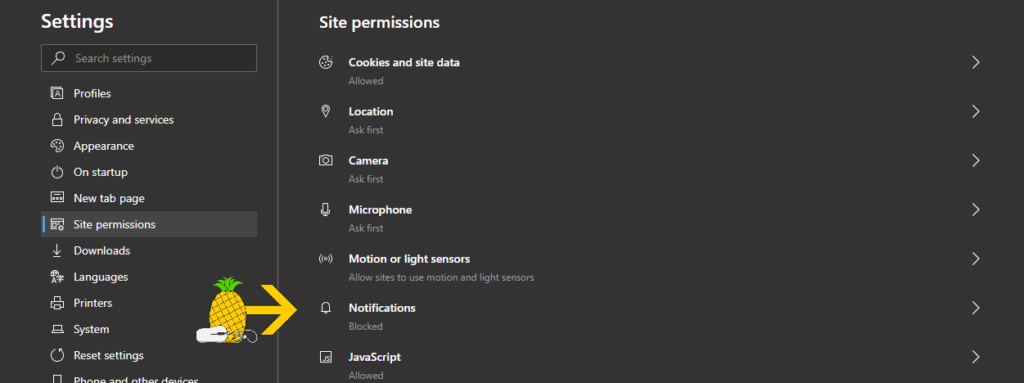
The default notification setting for Microsoft Edge is “ask before sending”. Honestly, this is a good setting to keep as is, however, feel free to turn this off to block all future requests.
Step 4: Scroll to the bottom of the page until you see the heading “Allow”. The sites listed below have permission to send notifications to your computer. Click on the settings menu, three dots, for a specific website to manage the notifications settings. There are three options:
- Block: Blocks all future notifications
- Edit: Change the URL/Web address associated with this site
- Remove: The website will have to ask for your permission again
Allowing notifications works the same way. Find the website under the “Blocked” heading and change the website options.
Step 5: Enjoy
Google Chrome
Since both Google Chrome and Microsoft Edge are built on the Chromium engine, the process is very similar.
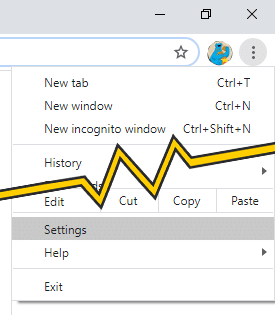
Step 1: Open the Chrome menu, the three dots, and click on “Settings”.
Step 2: In the left column of the settings page, click on “Privacy and security” and then click on “Site Settings” under the Privacy heading
Note: Site settings allows you to update permissions for other features like Microphone, Camera, Location, and more.
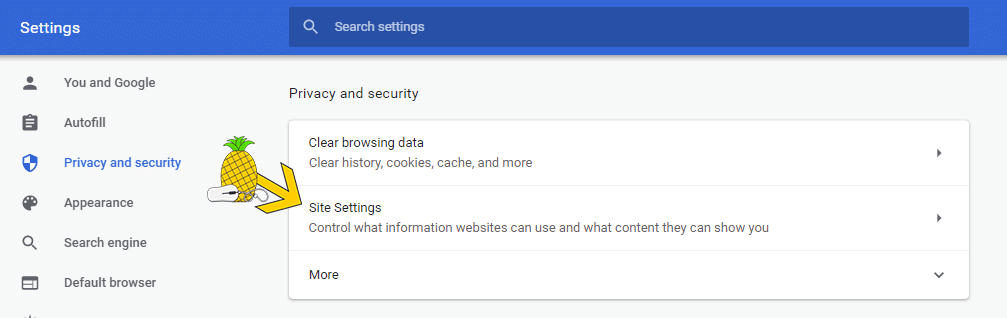
Step 3: Find “Notifications” in the list of settings and click on it.
The default notification setting for Google Chrome is “Sites can ask to send notifications”. Honestly, this is a good setting to keep as is, however, feel free to turn this off to block all future requests to send notifications. Chrome has a special setting for quiet messaging where Chrome will deny the site access to notifications without interrupting you, but allowed sites can still use notifications.
Step 4: Scroll to the bottom of the page until you see the heading “Allow”. These sites have permission to send notifications to your computer. Click on the settings menu, three dots, for the website you wish to manage. There are three options:
- Block: Blocks all future notifications
- Edit: Change the URL/Web address associated with this site
- Remove: The website will have to ask your permission again
Allowing notifications works the same way. Find the website under the “Blocked” heading and change the website options.
Step 5: Enjoy
Mozilla Firefox
Firefox uses a different web engine, not Chromium, therefore, is a little different process.
Step 1: Open the Firefox menu, three bars, and click on “Options”.
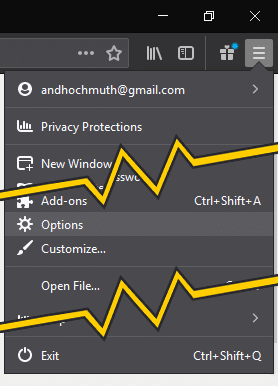
Step 2: In the left column of the Settings page, click on “Privacy and Security” and then scroll down to the Permissions section.
Note: The Permissions section is where you can update permissions for other features like Microphone, Camera, Location, and more.
Step 3: Click on the “Settings…” button for Notifications.
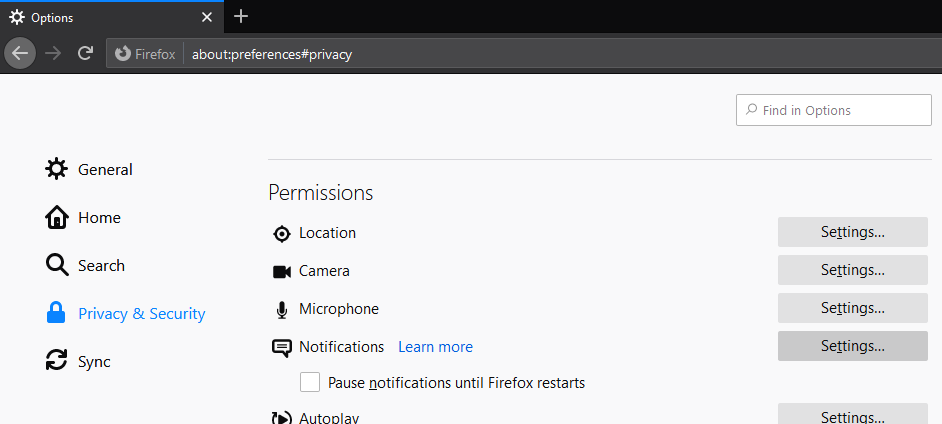
The default notification setting for Firefox is “ask before sending”. Honestly, this is a good setting to keep as is, however, feel free to turn this off to block all future requests to send notifications.
Step 4: Manage your notifications. With the addition of a search box, Firefox has the easiest interface by far. Now either change the selected website to Allow or Block.
Step 5: Click on “Save Settings”.
Step 6: Enjoy